Posted by barb on Dec 19, 2011 in
Crafty Me,
Random Thoughts Longtime readers may recall that last year I entered the inaugural Gin-GRR-bread Habitat Contest at the National Zoo. My entry turned out better than I had ever expected, and I was fairly certain I was going to win. Well, that is, until it broke when I was transporting it to the zoo.
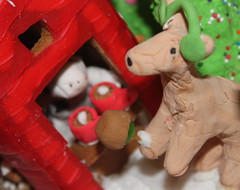
So, when the National Zoo announced this year’s Gin-GRR-bread contest, I was very excited – I was going to redeem myself this time! The theme this time was “Winter Wonderland on the Farm”, because the Zoo’s children’s farm was saved from closure this year by a generous donation from State Farm. I debated between doing a literal interpretation of the theme or thinking a bit outside the box – which one would the judges embrace?
I decided to go a little outside the box with my entry: Winter Wonderland Country Fair. Here’s the final entry:

The contest had a few requirements:
- food and drink for the animals
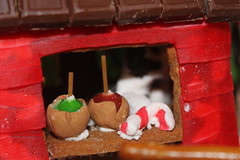
- space to move around and explore
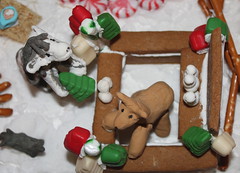
- and shelter from the heat or cold
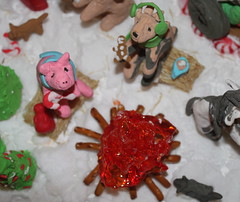
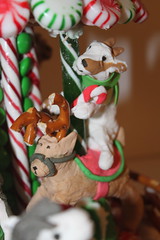
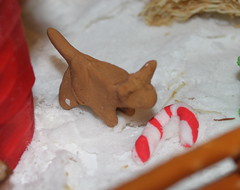
I added one secret ingredient to my entry – Ares and Duncan, the two cats that our household lost this year:
So, how did I do this year?
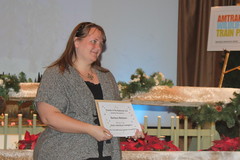
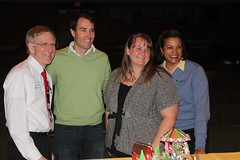
I won my category!!!!
Hmmm…does this mean I’ll have to be even better next year? Dear Lord, I hope not! I was already a crazy gingerbread-woman for a couple weeks in November…I’m not sure Andrew could take more.
Tags: baking
Posted by barb on Dec 28, 2010 in
Crafty Me,
Pictures 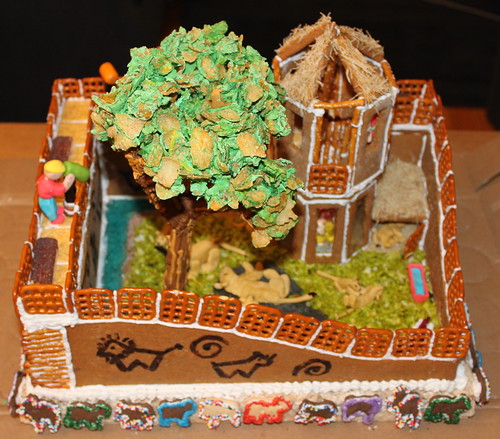
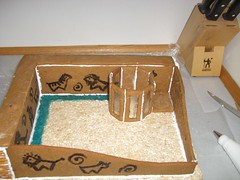
That last post was more of a reference for me so that when I do another gingerbread project, probably next year, I’ll remember what recipes I used and a few tips on what worked. Now, I want to give just a quick tour of my final gingerbread lion habitat – heavy on images, light on text.
The primary purpose of the habitat was to house the seven new lion cubs, so I made all seven of them, along with their moms.
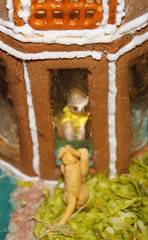
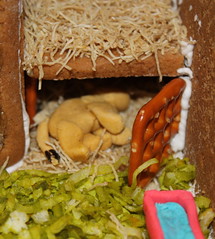
One interacting with a visitor and one sleeping:
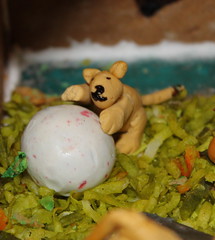
Two were wresting and on was playing with a ball:
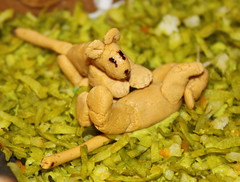
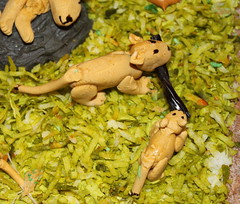
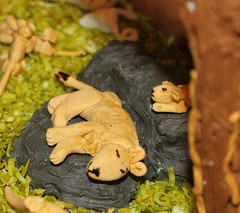
One was playing with Mom and a “fire hose”, and one about to pounce on her sleeping Mom
The lions needed a place to eat and drink, so I put the food in a animal rib cage, water in a boring trough:
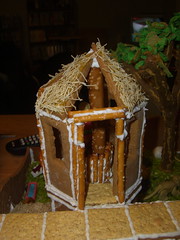
For the visitors, I had a “savannah lookout”:
And I made a few visitors to see the cute cubs:
Finally, I wanted to spruce up the final entry, so I added a few decorative touches:

Posted by barb on Dec 19, 2010 in
Crafty Me,
Pictures 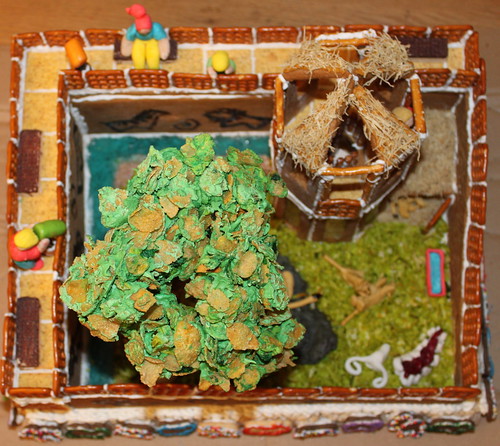
For several years I’ve mused about making a gingerbread project around Christmas. Each year I watch specials on the Food Network about gingerbread competitions, and I wonder if I could do that. The one project in the back of my mind is a mad scientist’s lab or an astronomers observatory – how cool would those be in gingerbread?
This year, though, was my year to jump in head first to the world of gingerbread. Why this year? Because the National Zoo in DC was holding a contest, Gin-GRR-bread Habitat Contest, to make a gingerbread habitat for the lions, including the 7 new cubs. The prize? A behind-the-scenes tour to meet the cubs! So the prospect of seeing the little guys (or girls) up close was my reason for getting into gingerbread this year. (I fear that I may be addicted now, but we’ll see if that holds up next year.)
This post is to document my process for anyone else who is thinking about getting into gingerbread and wondering how hard it is. The short answer is that it’s not that hard, but it takes a lot of planning if you want to do something overly detailed. I admit that I may be a bit of an overachiever, especially for my first project.
I started by making a model of my creation out of cardstock. This is crucial, but I forgot to take pictures of my model, and it is now all crunched up in my home office. The model should be the exact size that you want your project, and tape or glue it together to see where your seams will be. This will make sure that your measurements are correct and that the structure will stand. It will also make sure that you have all the pieces that you need to make whatever structure you’ve designed. (Of course, there are patterns online, so you could skip this step if you weren’t making an original design, like I was.)
The next step was to bake my gingerbread. I found this recipe in a quick websearch – follow all of their directions about cutting the pieces, baking, and trimming baked pieces. (Trimming baked pieces is important for structural integrity, though royal icing can cover a lot of flaws if necessary.)

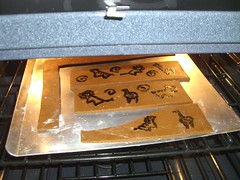
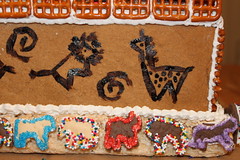
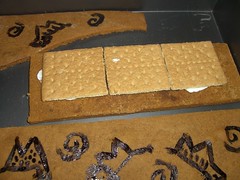
I painted a few details on my gingerbread pieces before baking – the paint was gel-based food coloring.
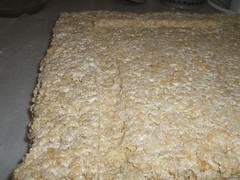
With my gingerbread pieces made, I needed to cover my wooden base with something edible (because of the rules of the contest &150; if you’re doing this for fun, no need to be quite as complete). I decided on crisped rice bars (also know as “Rice Crispie Bars”, but I didn’t use the name-brand cereal, so we’ll go with “crisped rice”). I looked around on the internet to see what recipe was recommended for crisped rice bars when using them for sculpting rather than eating. The two things I picked up were: eliminate the butter and crush up part of the crisped rice cereal. So the recipe I used was: 10-ounce bag of mini marshmallows and 6 cups crisped rice cereal (before crushing any). Once the cereal was measured, I crushed up a few handfuls of it until it measured 4.5-5 cups. Melt the marshmallows and then stir in the cereal. The crushing makes the end product a bit more dense, which is good for sculpting.
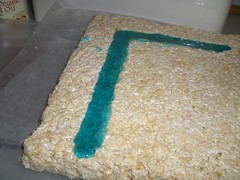
I covered my wooden base with the crispie treats. I also wanted to make a moat for my habitat, which I thought I’d do with poured sugar or icing, so while it was still relatively warm, I cut a trench into the crispie-treat-base. You can kind of see it in the picture below.
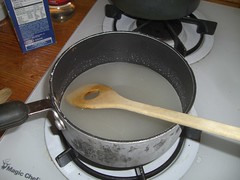
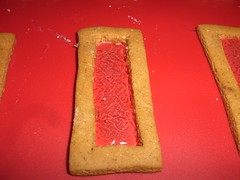
Next up, I needed windows for part of my creation (the idea was to have a little “lookout” where visitors could feel like they were part of the lion pride…the bottom floor of the lookout was within the lion enclosure and had really big windows). I found a few ideas on the web for gingerbread house windows, many of which were not see-through. I needed see-through windows, since I wanted to put a few visitors in the lookout, looking out on the lions. The best idea for see-through windows was to use hard candy. This could be done using pre-made hard candy, placing an opened piece in a window hole, then baking it in the oven until the candy melts. However, I couldn’t think of any hard candy that would have melted clear, so I made my own. (UltimateGingerbread.com has a page of window ideas, including the hard candy recipe I used.)
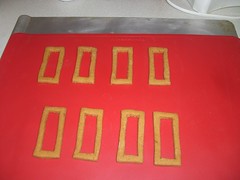
After making the hard candy, I poured my windows (I put them on a silicone baking mat, which made them very easy to remove when they were hardened and cooled later). Then I quickly colored the rest with some blue gel food coloring, and poured it in my moat-trench to make water.
With my base ready, I could start assembling my habitat. I used the recipe for royal icing on the same webpage where I got the gingerbread recipe. I noticed that a few of my larger gingerbread pieces were a little unstable (I was afraid they would break), so I started by strengthening them a little with graham crackers.
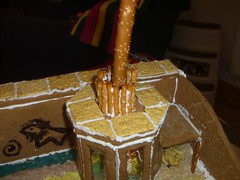
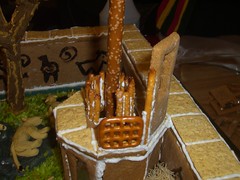
Then started assembling the structure, starting with the inner walls (the ones next to the moat), then the outer walls, keeping it close enough that my walkway would work. When I put out the final walls, I discovered that I had cut them a little short, so that the area under the walkway would have been visible. I didn’t feel like baking more gingerbread, so I improvised with a stack of pretzels (visible in the picture below)…in the end, it really fit in with the overall look of the habitat, so I was happy with how it looked.
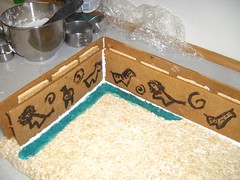
Then the lookout structure went up. I spaced it away from the left wall using the gingerbread piece that will be used as a roof for the lion’s shelter.
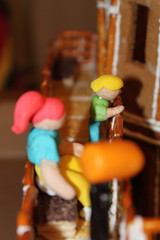
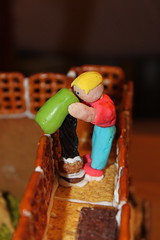
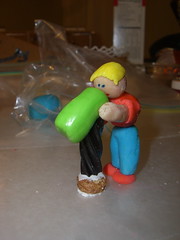
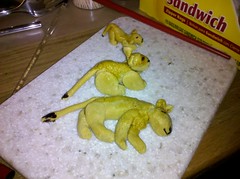
Before finishing the structure, I wanted to make my people figures. This was because I wanted to have a couple in the bottom of the lookout, looking out on the lions. So I made up some gumpaste, using a mix from JoAnn’s. I colored it using gel food coloring. From it, I made all 7 lion cubs, 2 adult lions (the moms), and a few people.
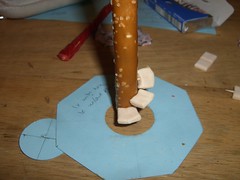
I also needed a staircase for the lookout before attaching the top. I did this using a rod pretzel and cut-up pieces of Trident gum attached with toothpicks. I actually added a little royal icing to keep the gum on the pretzel a little better.
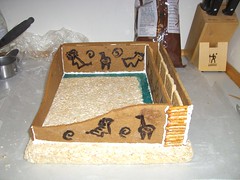
Then I put in the staircase, and placed the people in the bottom of the lookout (also deciding on the placement of the lions). Then I put the main floor on the lookout, along with railings for the staircase.

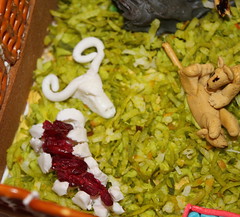
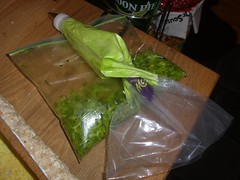
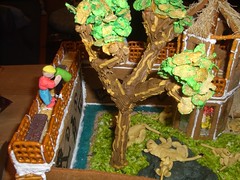
Next came doing something with the ground. I had a large “rock” made from crispie rice treats that I covered in grey-colored royal icing. Then started on the grass…I originally thought I’d use the grass-tip on the icing bag, but found that the royal icing I made wasn’t stiff enough to do it right. So, I started with a layer of green royal icing (because I’d already started trying to pipe the grass in, so I just iced the bottom so it would all be even). In the end I used coconut colored with green and a little yellow coloring.
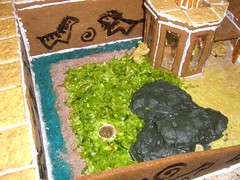
After adding the lions,
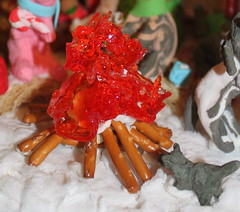
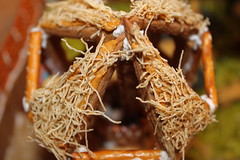
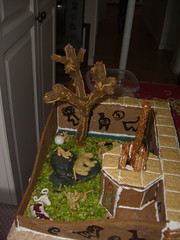
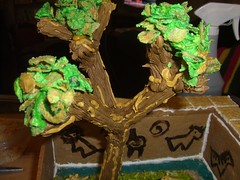
Then…the tree. Ahh, the tree. It looked very cool when I was done with it. Plan A had been to use bendy straws covered with sculpting crisped rice treats, but that failed utterly. Instead, I used a few rod pretzels connected with royal icing and toothpicks. My downfall was putting the tree on before delivering it to the judging site…or in using pretzels instead of a dowel screwed into the base and tightly secured…but more about that later. I attached it to the base, using a Nilla Wafer cookie to help stabilize it (oh how naive I am). For the leaves, I used corn flakes with green-colored royal icing mixed in. (I added more after the picture below was taken.)
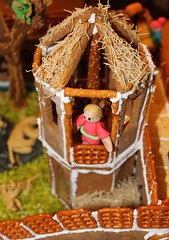
Next, I finished the lookout, complete with a windows, railings and a roof.
Finally I added the finishing touches – the people, railings, benches, and some decoration along the base of the design.
I’ll write another post taking a tour of the completed habitat…here I just want to close with saying that the tree, unfortunately, didn’t make it the judging of the contest. First it toppled as I was carrying it to the car, so I replaced it when I dropped off my entry. But then, it toppled again less than a week later on display at the zoo. Boo.
One thing I learned was that I really need to trust my gut instincts. I had thought about waiting until we got to the zoo to attach my tree in the first place….that would have been a grand idea. Once the tree broke the first time getting into the car, I thought I should maybe not put it back on…that might have been a good idea, too, since the second time the tree toppled, it did quite a bit of damage, which I couldn’t fix. Even before I constructed my entry, I had considered using a dowel for the tree…that probably would have been the best idea.
Still, a very fun project, and I’ll certainly enter again if they have another contest next year.
Posted by barb on Aug 25, 2010 in
Crafty Me,
Pictures I haven’t been scrapping very much lately…as many of you know, 2010 has been a difficult year, so motivation to do much other than go to bed has been pretty low. Then, when I would want to scrap, I’m faced with this mess:
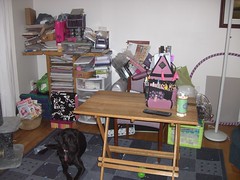
Yeah. I have to navigate the mess, a commitment just to get started. So…no scrapping.
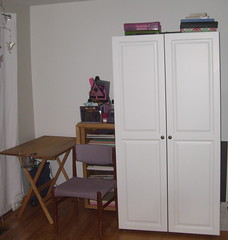
Enter the scrapbook convention and The Original Scrapbox. After much discussion, Andrew and I decided that it would make both of our lives a little better – mine because I could scrap again with an organized area, and his because he wouldn’t have to stare at that mess in the living room all the time.
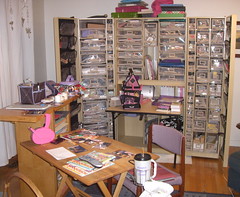
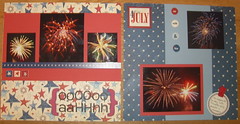
Here’s the result:
When I’m not scrapping
When I am scrapping
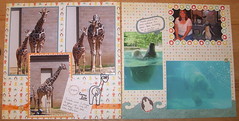
Going up to Laurie’s to scrap this weekend inspired me to finish getting all of my scrapping stuff put away (I’d done most of it as of a couple weeks ago, but still had a few little bits of stuff hanging out until this past weekend).
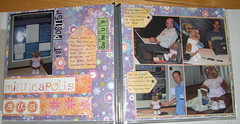
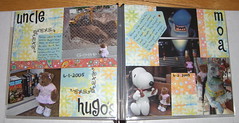
Finally got back to my 2006 pictures, doing a few at Laurie’s, and continuing Sunday and after work Monday and today. It feels so good to be creative again. Here are a couple of my favorite layouts from the past few days’ efforts:
Tags: comfort, scrapping
Posted by barb on May 13, 2008 in
Crafty Me,
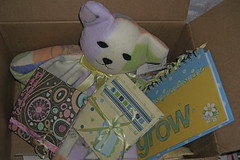
Pictures Felicia’s cap for graduation is ready:
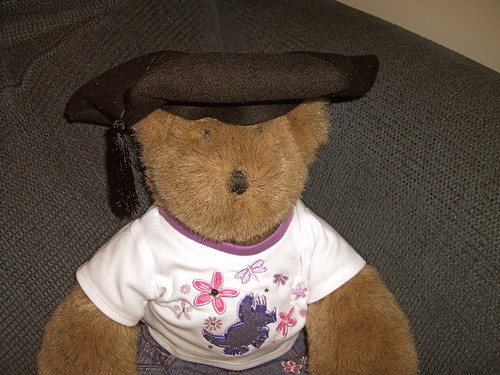
Now, if I could just get the gown the right color, I’d feel pretty good.
Tags: build-a-bear
Posted by barb on Mar 3, 2008 in
Crafty Me I haven’t been scrapping with Laurie in a long time, so we decided to get together in February around her birthday. Sadly, Laurie’s household was all sick with the flu when our scrapping date came around, so we postponed until this past weekend. I spent *all day* Saturday up at Laurie’s house. Really, all day. I think Laurie was sick of me by the time she kicked my arse out, but, hey, it’s her fault for not kicking me out sooner.
For part of the time Laurie’s friend Kirsten joined us – she’s new to scrapping, so we had to show her some things that she *needs* to waste…er, invest, her money and time on to improve her scrapping.
Felicia also came along, since I was starting on her scrapbook. She and Ruby helped out with our scrapbooks.
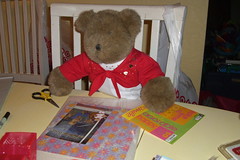
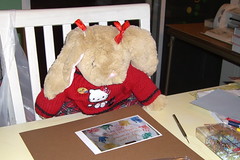
Here are a couple of my completed pages:
I was very naughty on Sunday, and continued scrapping instead of working on my thesis. Oh well, at least I feel nice and refreshed and ready for writing this week. (That actually was not sarcastic, though it might have been hard to tell.)
Tags: build-a-bear, scrapping
Posted by barb on Dec 22, 2007 in
Crafty Me,
Pictures I decided to sign up for the Holiday Ornament Swap hosted by freshly blended and cake & pie this year. I clearly didn’t have the time to hand-make 8-10 ornaments this year, what with writing my PhD thesis, but that didn’t stop me. I started just before Thanksgiving and got them out in early December.
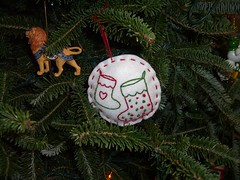
I’m so glad I signed up! Every couple of days I go out to my mailbox and find a package with another really cute, hand-crafted ornament from the women in my group. Here’s what I’ve received so far (I think I’m missing one):
Ornament from Katy:
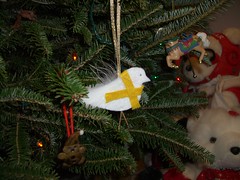
From Jen:
More below the fold…
Read more…
Tags: christmas
Posted by barb on Oct 14, 2007 in
Crafty Me,
Pictures I’ve been looking for scrapping groups in my area for a while, but the recent crops have coincided with my travel schedule. Finally, yesterday, was a crop that I could make. The crop was run through Scrapeppers (who is merging with another area crop organizer in 2008 to become Crops Plus).
I ended up at a table with the other 3 ladies who were new to Scrapeppers, and we had a great time. I was there from about 10 AM to 8:30 PM, and completed four spreads:
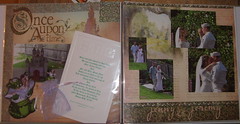
Jenny’s wedding
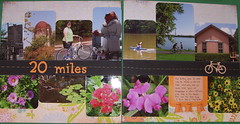
2005 biking pics:
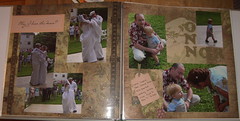
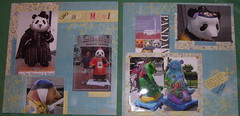
And Pandamania pics:
I’ll be back for the Scrapeppers Holiday Crop in December. Oh, and Sarah’s Cropping Corner crop in November.
Tags: scrapping
Posted by barb on Aug 28, 2007 in
Crafty Me,
Pictures 
As I mentioned earlier, I grew up in MN, so the 35W bridge crash hit close to home for me. My friend, Sweetie, is helping to organize a craft sale to benefit the families of the victims of the crash. If you are in the Minneapolis area, please consider going to the sale next week, September 6, at Grumpy’s downtown.
For more info, check out the announcement at Crafty Planet.
I sent off a few contributions to the sale last Friday:
Tags: causes
Posted by barb on Oct 26, 2006 in
Crafty Me Andrew is going as Sherlock Holmes, and I’m going as Violet Hunter. Violet is a character from a Sherlock Holmes story and is reported to be the female character who got the closest to marrying Holmes of anyone (I think — Andrew is the Holmes fan, I have yet to read any).
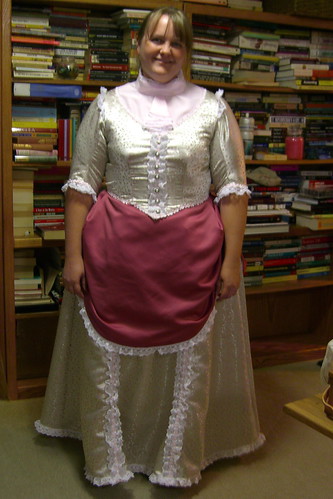
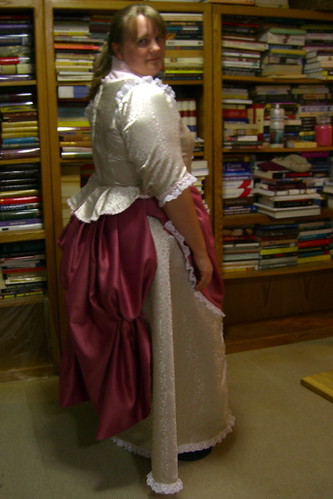
Sadly, the pictures do not do justice to my costume. The main fabric of the bodice and skirt is shiny, so if we use a flash, it ends up having weird shadows. Andrew snapped a couple last night without flash, but they’re a bit grainy (and the seam up my bosom just looks wrong).
I decided to forgo the bustle pillow, though looking at the pictures, I might be better off with it. I figured that I have enough butt as it is, but the bustle might sit better with the pillow under there. Oh well — that will have to wait until later.
We have the Halloween Pops concert tonight, so everyone sent good costume-staying-together thoughts my way.
Tags: halloween, sewing